Apron Couture: Sizzle in Style
By Anelia Van Zyl, Pattern by Johanna Greyling
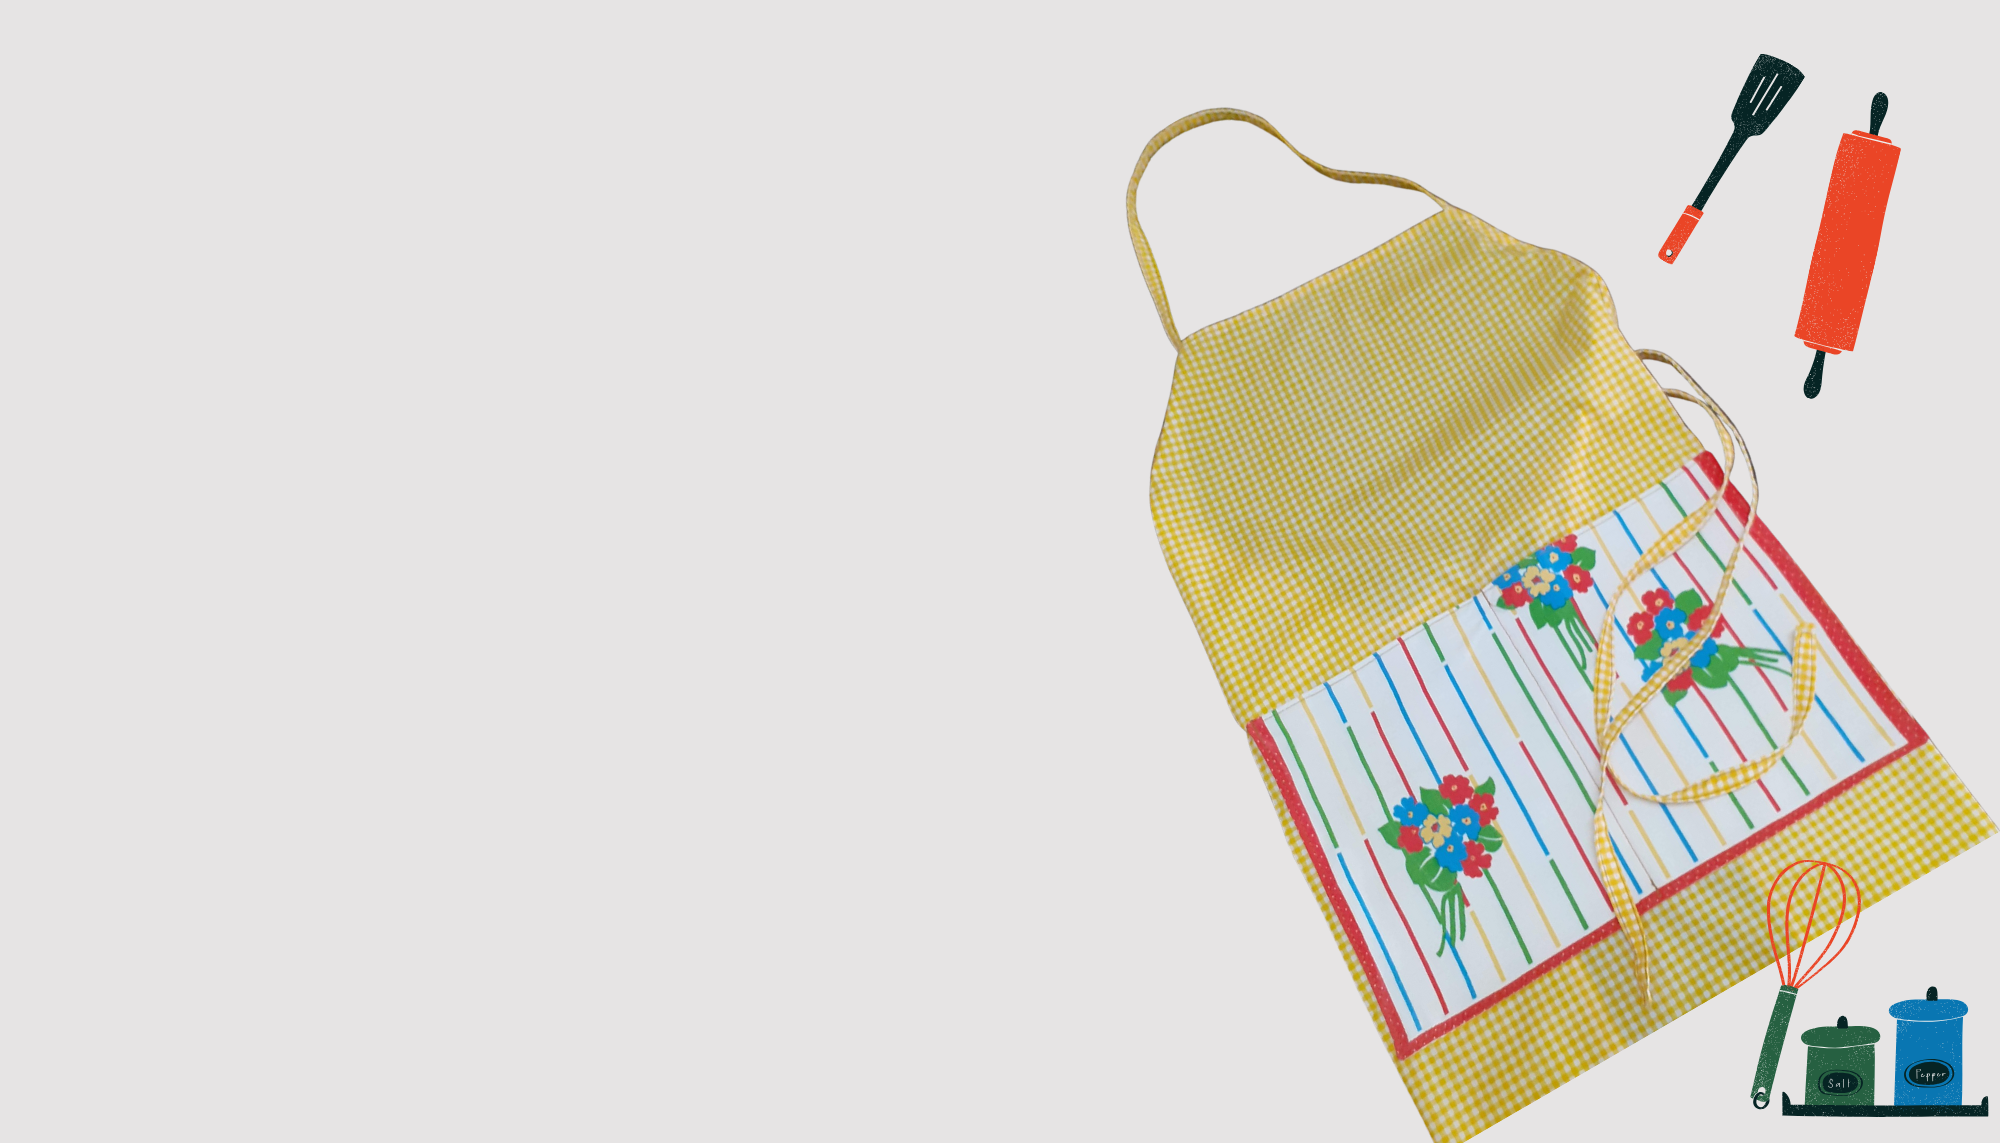
The apron is the unsung hero of the kitchen, protecting your clothes from spatters, stains, and spills while you cook up some culinary magic! It’s not just an accessory; it’s your culinary sidekick and keeps you looking fresh and fabulous during your kitchen adventures. It’s time to get whimsically creative in the world of DIY fashion. Grab the prettiest fabric and prepare for an apron adventure that is just as fun as it is functional.
SUPPLIES
(This pattern makes one apron to fit an adult or an older child.) • 1.5 m of main fabric (apron and strings) • 40 cm x 40 cm of accent fabric (pocket) • Matching thread • Fabric scissors • Measuring tape or ruler • Sewing pins • Chalk or erasable fabric pen • Sewing machine • Iron and ironing board
 STEPS
STEPS
Fabric cuts:
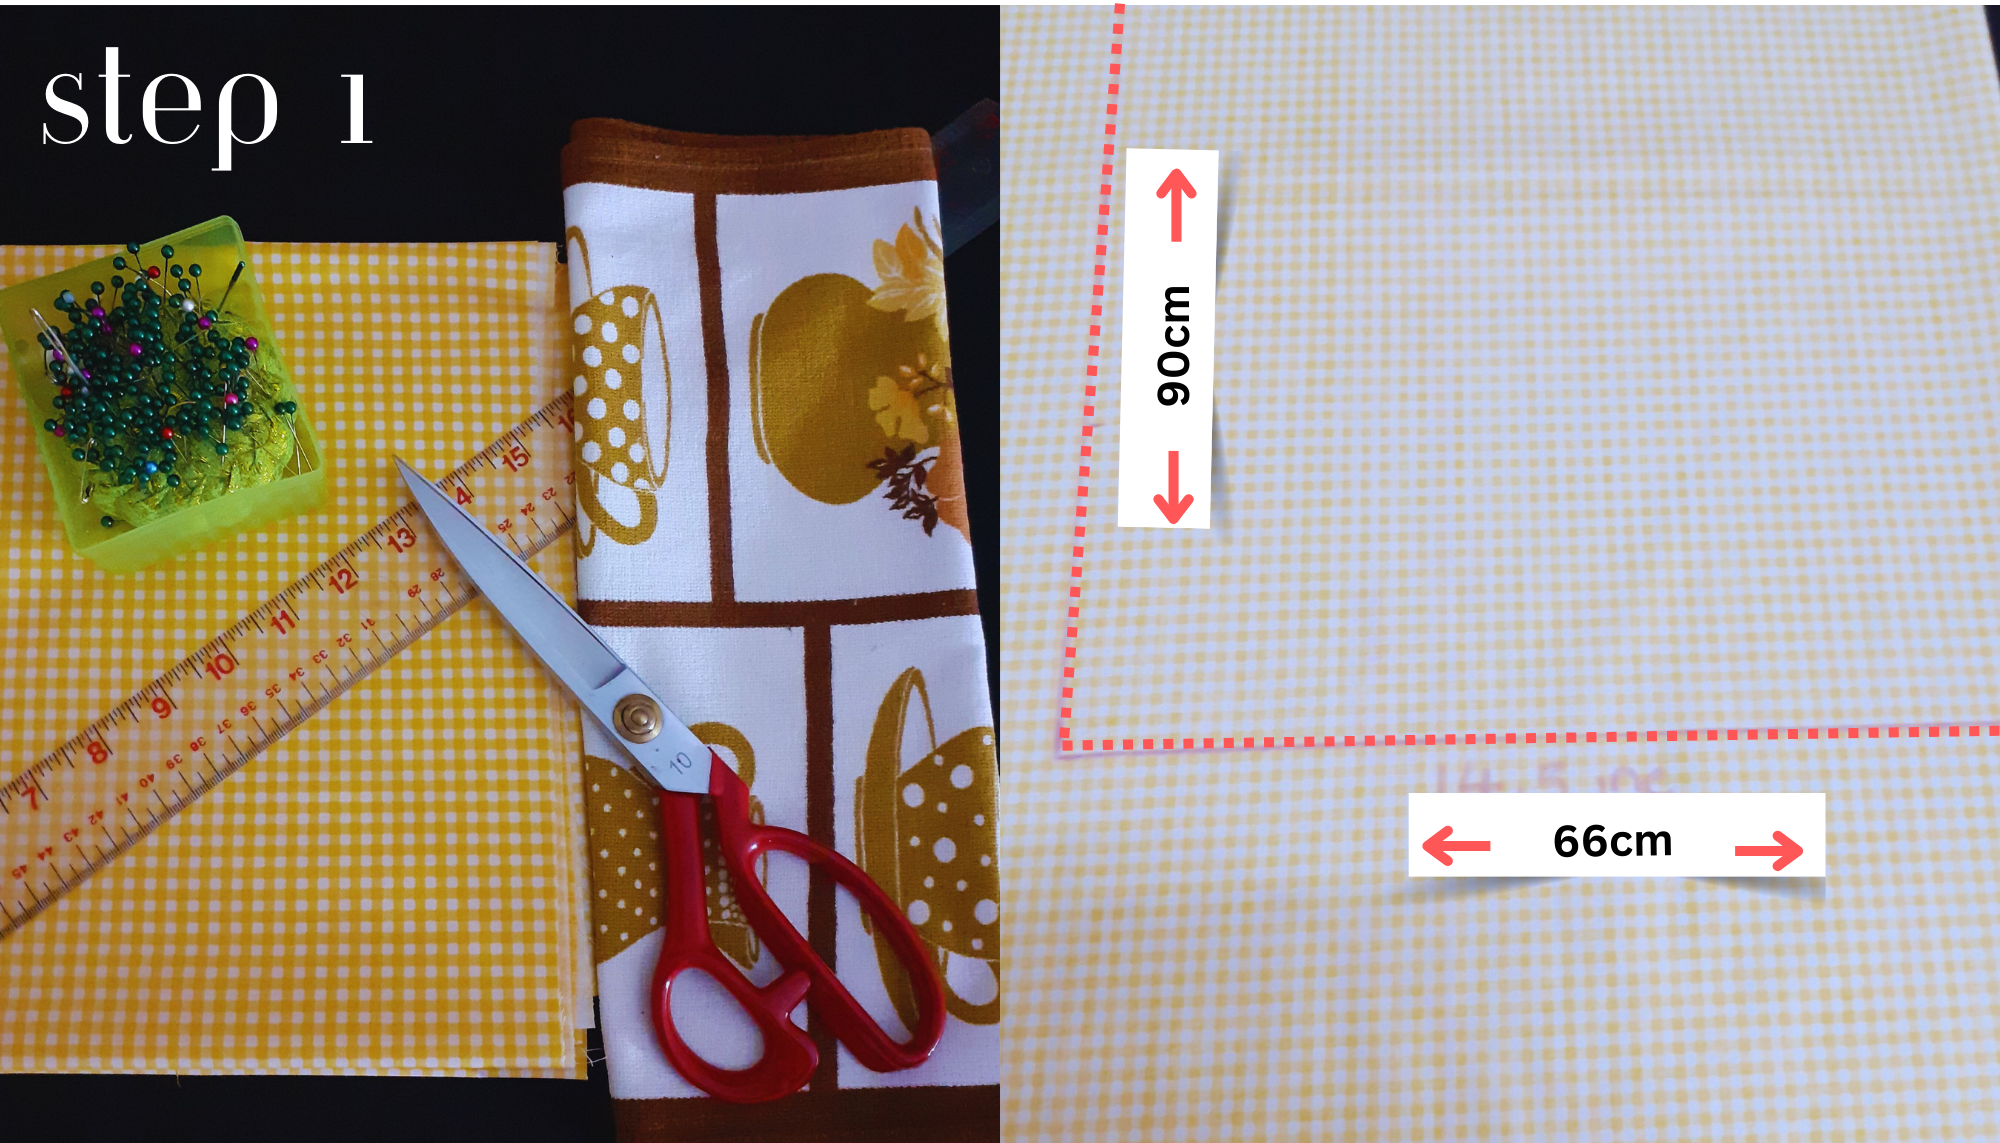
1. Main fabric: Fold the main fabric in half with the right (patterned) sides together. From the folded edge, measure out a 33 cm x 45 cm rectangle, and cut this out through both layers of fabric. When you open the folded fabric, you will have a perfect rectangle of 66 cm x 90 cm. This will become the body of your apron. Next, cut three 7 cm x 1.5 m strips from the remaining main fabric.
2. Accent fabric: Cut a rectangle of 30 cm x 35 cm from the accent fabric. This will be used to make the apron pocket.
Apron body:
3. Lay the 66 cm x 90 cm rectangle you cut for the apron body face down. Create a double-folded hem by folding and pressing the raw edges of the rectangle at 0.5 cm, then folding and pressing again at another 0.5 cm. When you’re finished, each raw edge should be inside the folded hem. Use sewing pins to keep the folds in place.
4. Stitch along the back of the hem using matching thread. Remember to reverse stitch at the end of each edge to secure the hem.

5. Turn the rectangle face up and fold it in half by bringing together its longest sides, ensuring that all edges are aligned. Secure the fabric with pins for the next steps.
6. Along the top of the rectangle, use a ruler and measure 15 cm in from the open edge and mark with the chalk or fabric pen. Then use your ruler to measure 40 cm from the top along the open side edge and mark. Draw a diagonal line from the 15 cm mark to the 40 cm mark.
7. Now cut along this diagonal line to form the shape of the apron. Yes, you will cut off some of the seam, but that is OK. Hemming the raw edges as we did in steps 3 and 4 makes this next part easier and neater.
8. For each diagonal raw edge, fold over 0.5 cm and press, then fold over another 1.5 cm and press. Use pins to secure the folds.
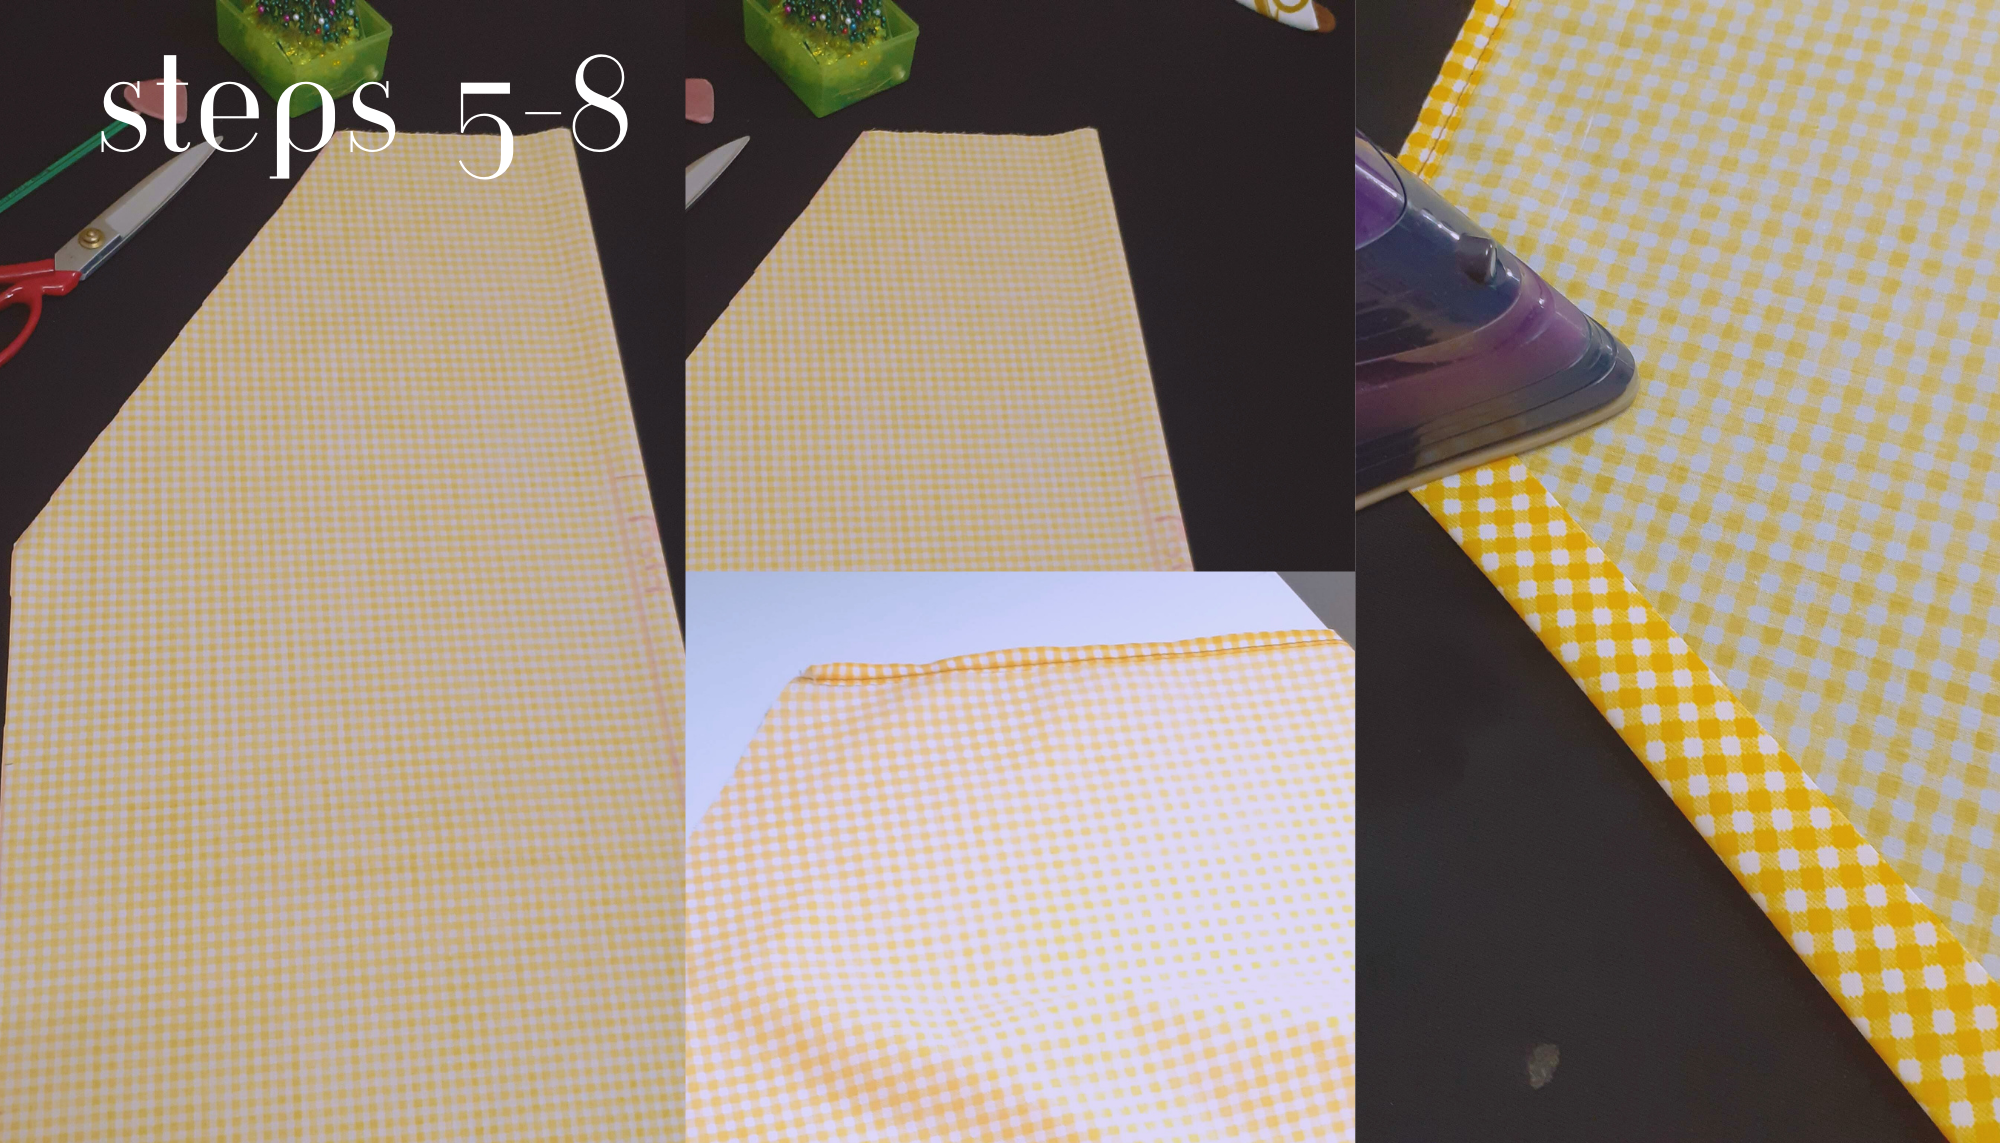
9. Back to your sewing machine, sew along the back of the folds, leaving open the ends to create a channel or “casing”. This is where we will insert the string to make the apron adjustable.

Apron strings:
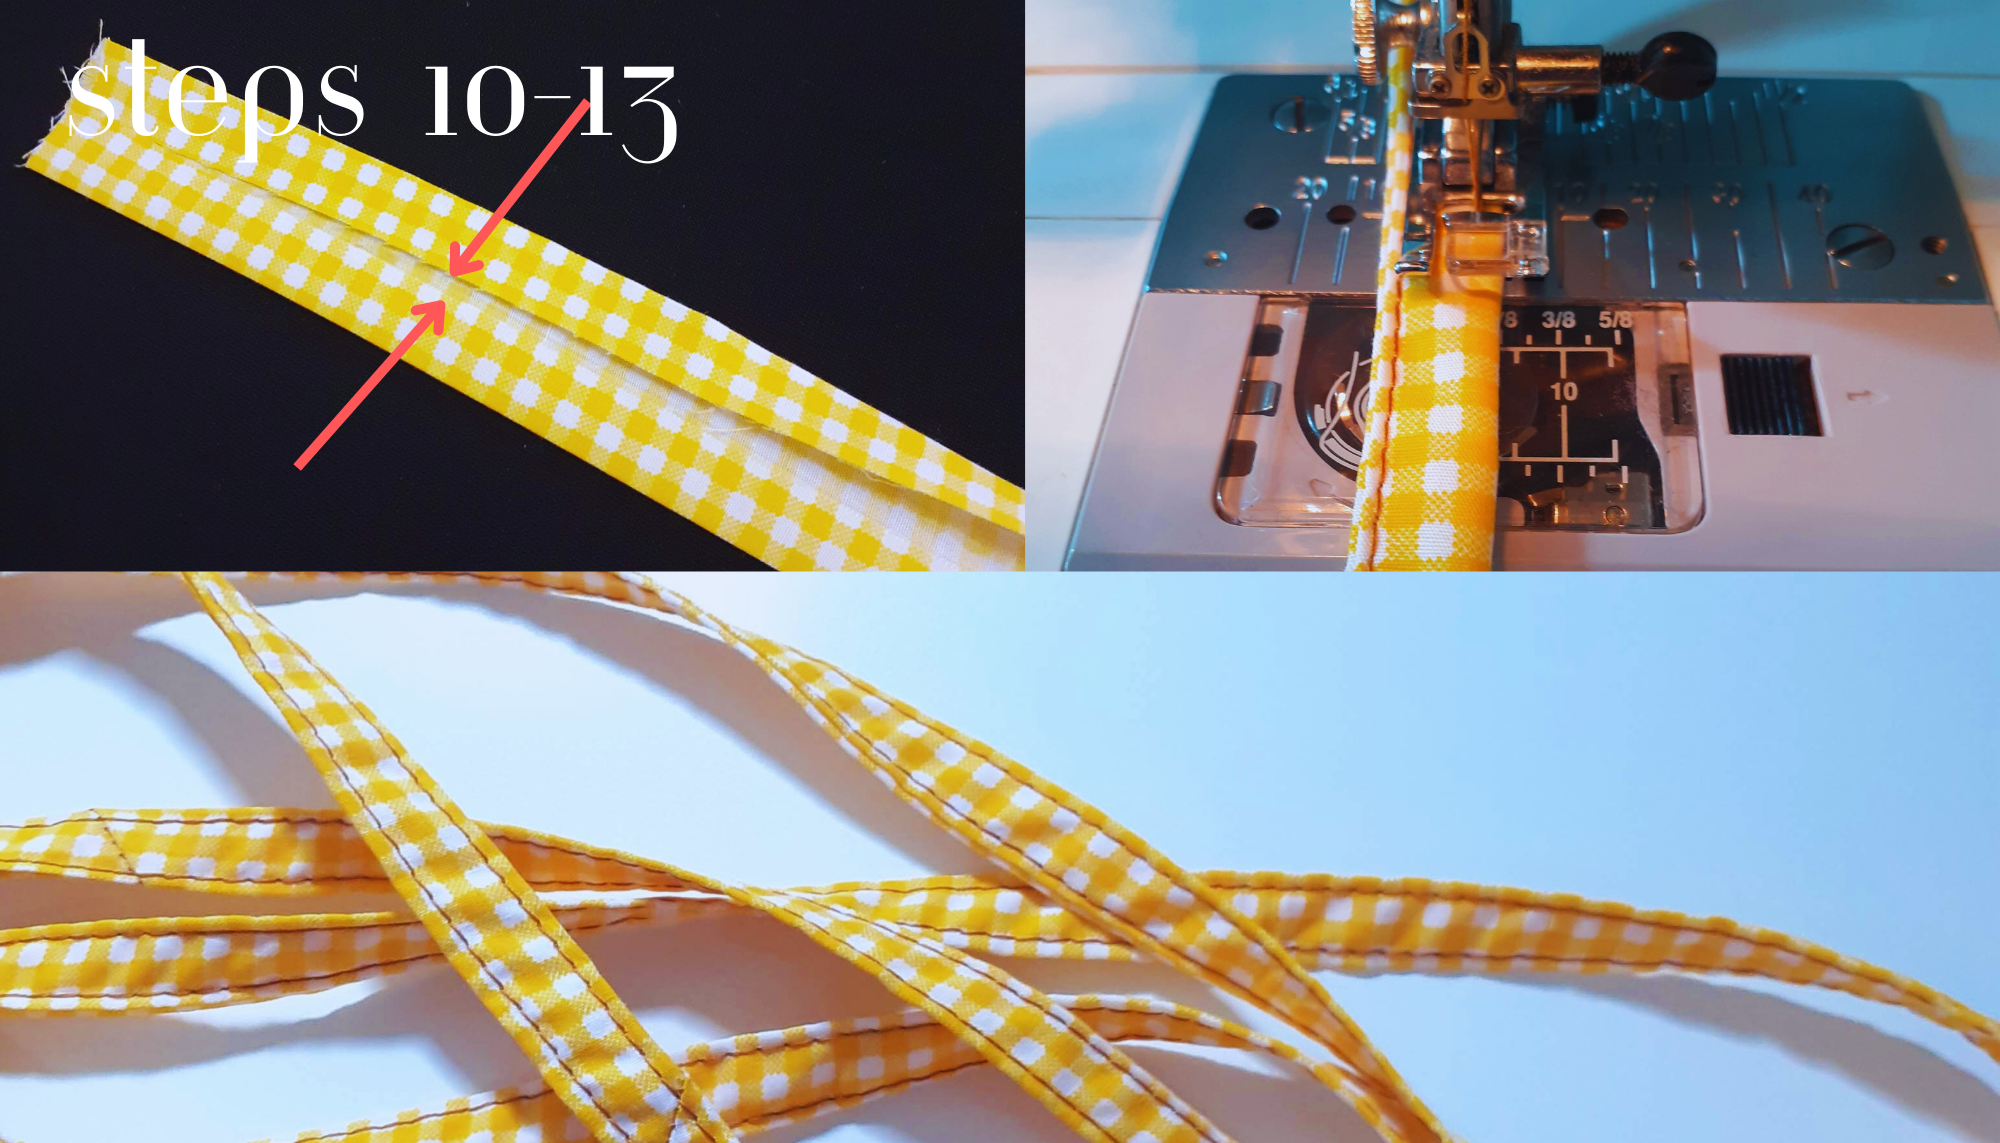
10. With the right sides of the long strips together, align the short ends and stitch them together to create one long string. Press each seam open.
11. Fold both ends of the string over by 1 cm, wrong sides together, and press. 12. Fold the long sides of the string towards the center and press. 13. Fold the entire length of the apron string in half and edge stitch.
Pocket:
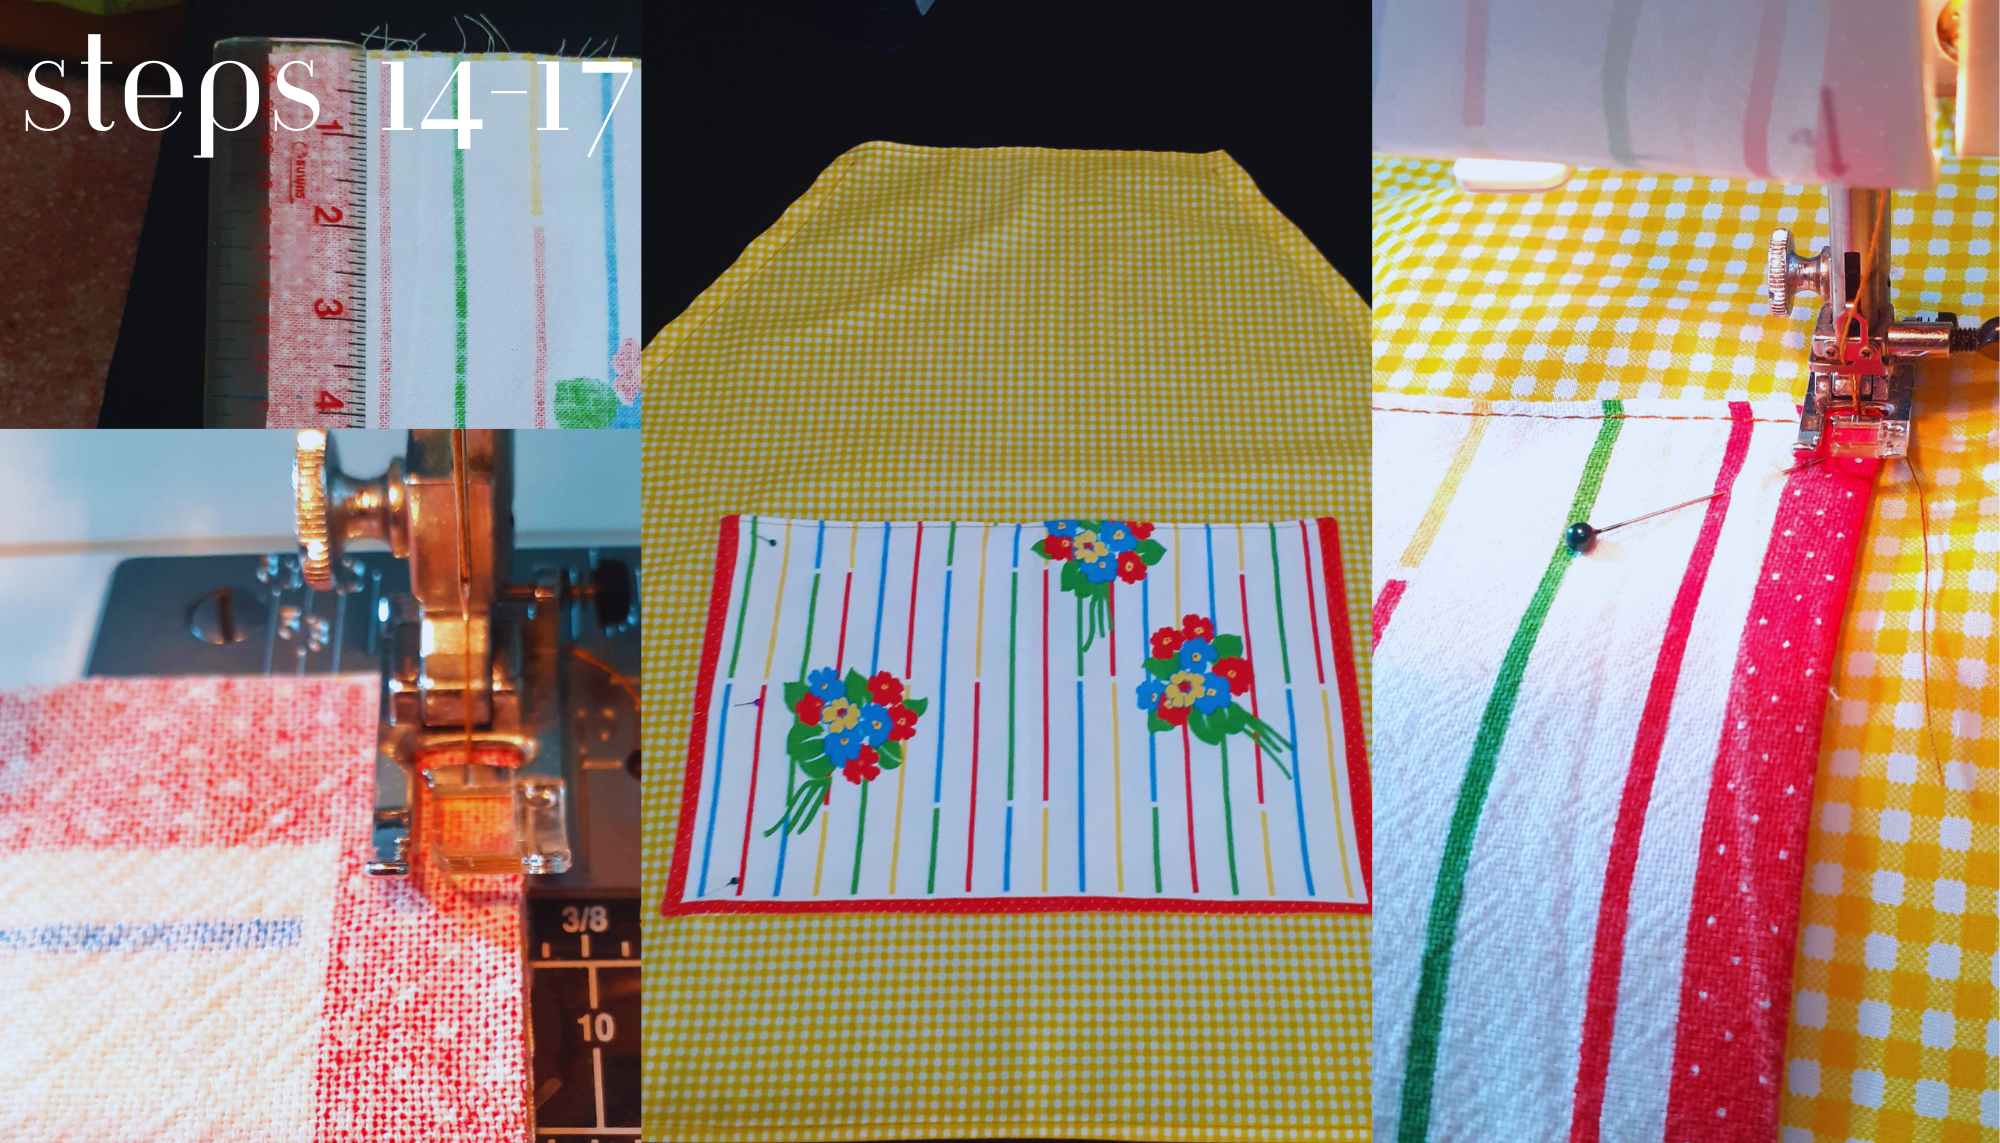
14. Double fold and press the raw edges of the smaller rectangle at 0.5 cm and 0.5 cm again. Now stitch along the back of the hem with matching thread.
15. Fold the apron in half, with the top over the bottom, to create a top edge. Align the top of the pocket along this edge, then unfold the apron body. You can use chalk or a fabric pen to mark the center if the crease is not clear.
16. Position the pocket so that it is centered, and hold it in place with sewing pins.
17. Edge stitch the bottom and two sides of the pocket onto the apron body. Remember to leave the top edge open!
To finish:
18. Attach a safety pin to one end of the apron string. Pass the string through the casings you created in step 9, moving up from the bottom on the left side of the apron, over the top, forming a loop that will go over your head, then down through the top of the casing on the right side. Adjust the strap to your liking.
Happy cooking in DIY style!
Photos courtesy of the author.
About the Authors
Anelia is a performing artist from South Africa. She has been living and working as a teacher in Thailand for nine years. She also writes educational children’s books, makes music, and loves to spend time in the kitchen. Follow her adventures on IG @aneliavz.
Johanna is a Bangkok-based educator, sewing boffin, and the creator behind this pattern! She likes to travel and has been to 27 countries while working as a nail technician on cruise ships. Connect with her on IG @sew_whathanna